In Bloom- Thank You
This card can be used for so many occasions, all you do is change the sentiment.
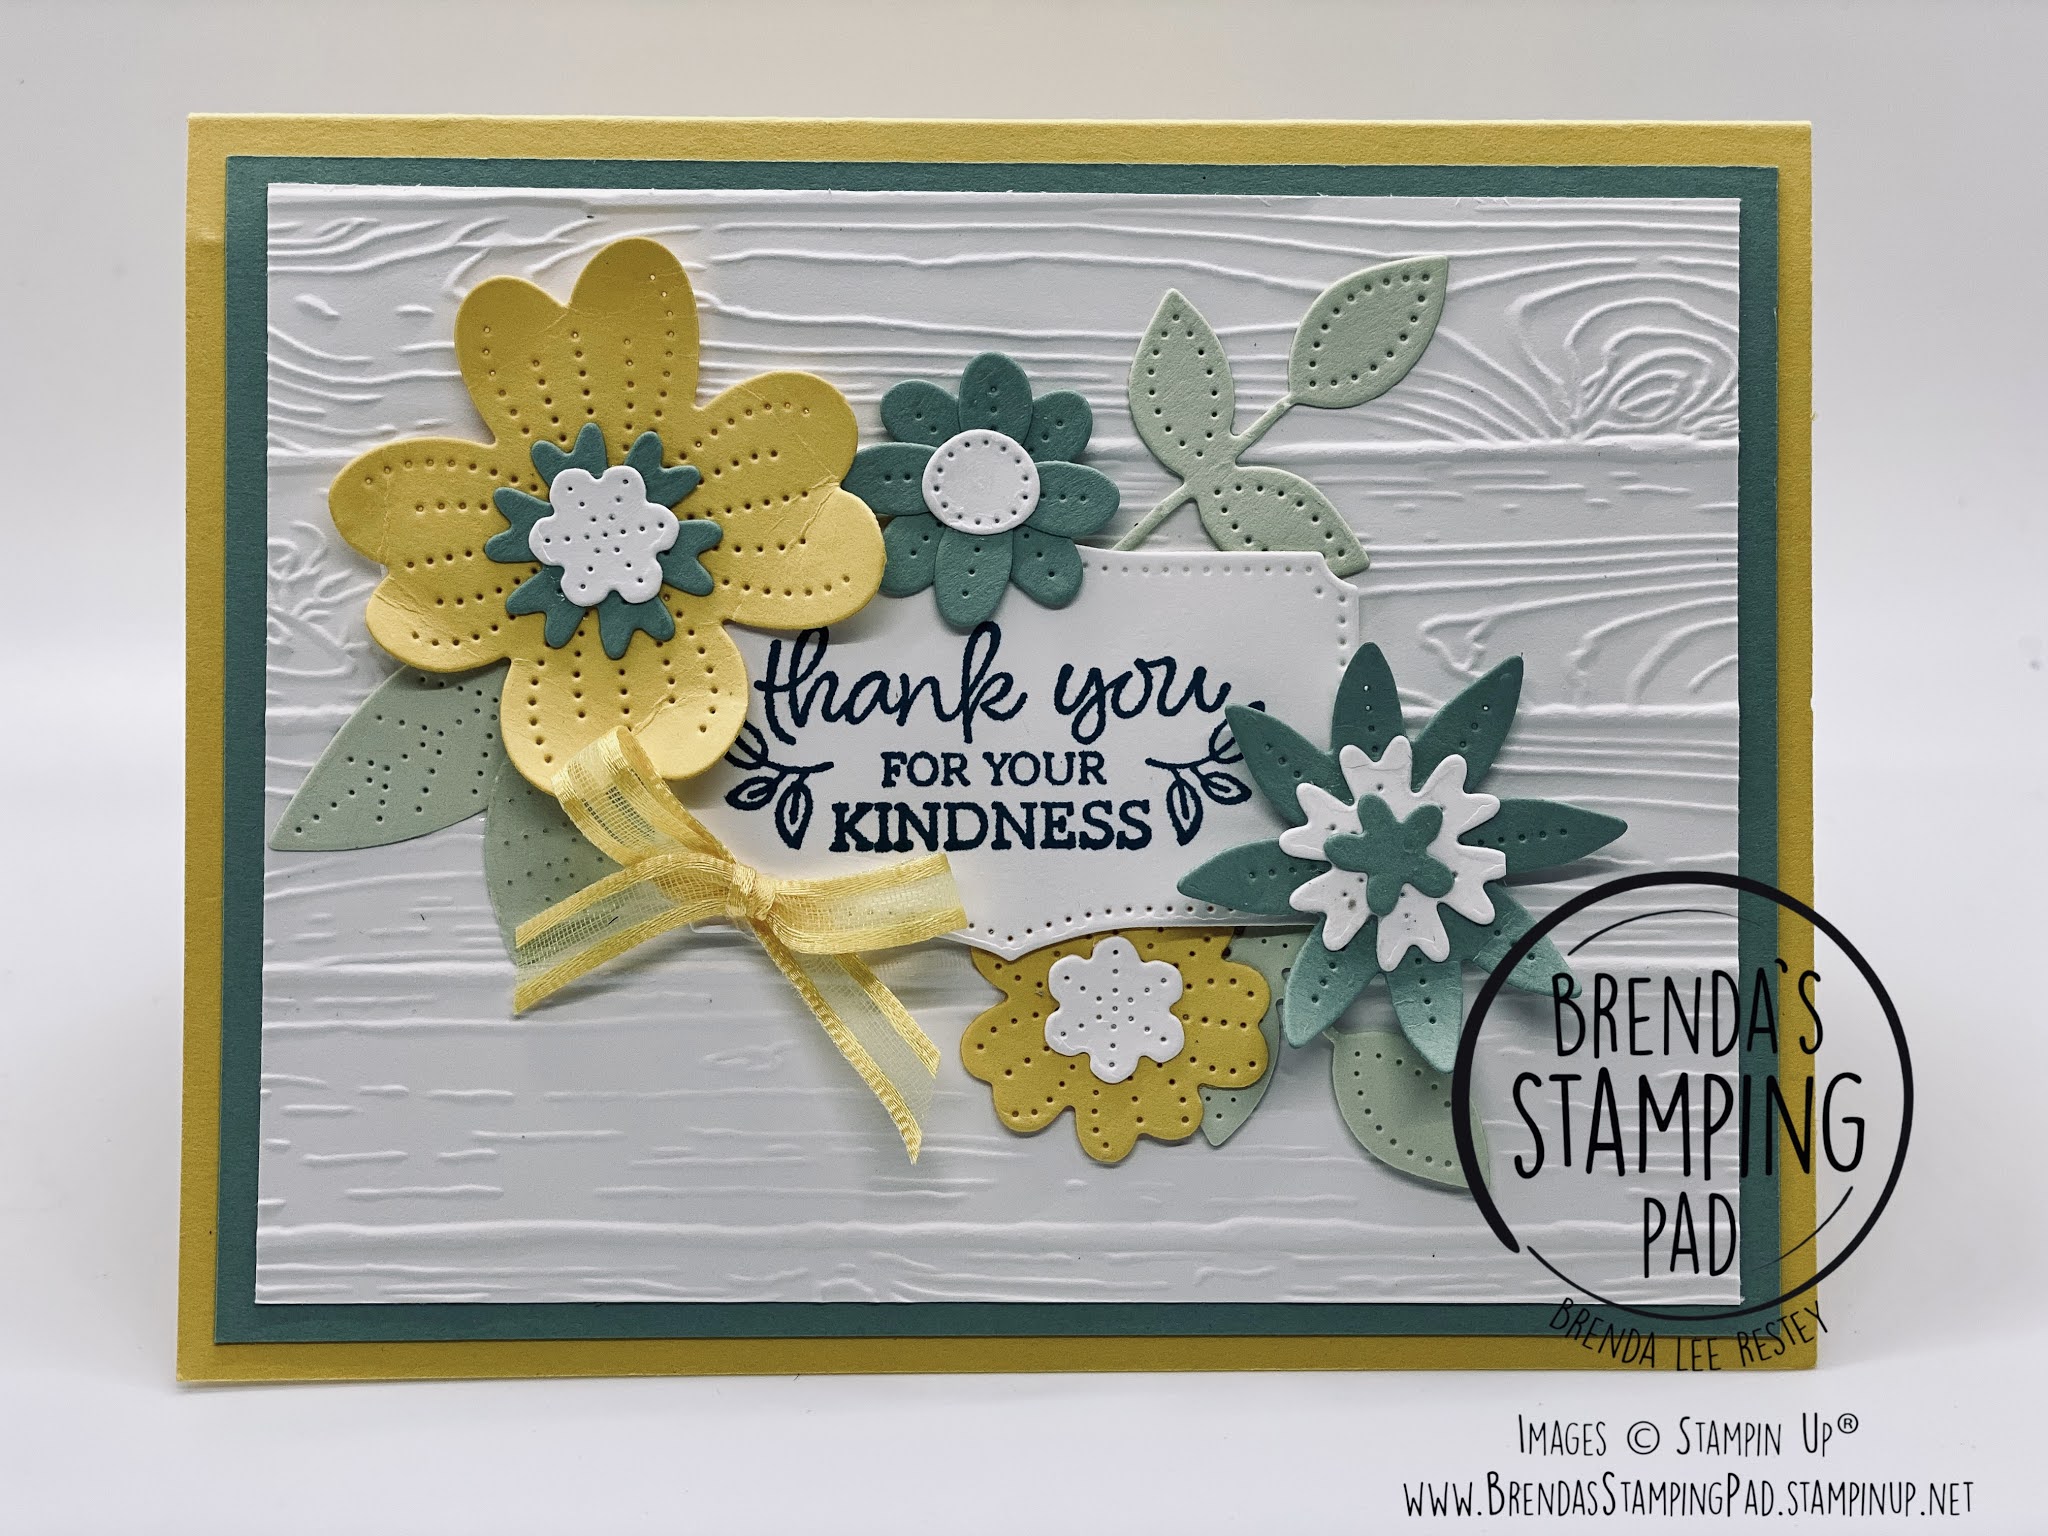
First I folded the card base and burnished with a bone folder. I adhered the Mint Macaron mat to the base using Multipurpose Liquid Glue.
Next, I ran the white piece through the Stampin Cut and Embossing Machine (regular size) using the Pinewood Planks 3D Embossing Folder (Annual Catalog 2020-2021). I adhered that piece to the Mint mat with the glue. Because of the embossing, you want to be sure to use glue or Stampin Seal +. It will stay in place better. Nothing is worse than having your beautiful card fall apart.
For the sentiment, I took a piece of basic white cardstock and used the die from the Pierced Bloom Dies. I ran it through the die cut machine and then stamped the sentiment from Oval Occasions (Jan-Jun 2021 Mini Catalog) in Pretty Peacock ink. I adhered this to the center of my card using Stampin' Dimensionals to pop it up.
Using the scraps of other paper, I die cut pieces of the flowers in varying colors of Daffodil Delight and Mint Macaron. The leaves were cut using Soft Sea Foam cardstock. I then placed them around the sentiment. I started with the larger leaves first, tucking them under the sentiment, and then added a couple of the large blooms. I used glue or Glue Dots to hold in place.
I finished it off with a small bow using some Daffodil Delight ribbon I had on hand. I curled up some of the flower petals to add depth and dimension.

Naturally, the inside needs to be finished. I used the In Bloom stamp set that coordinates with the Pierced Bloom Dies (this set comes bundled too so you can save 10% - Jan-Jun 2021 Mini Catalog). I stamped a yellow flower with the mint green center on the white piece. I then adhered to the base with liquid glue. I tend to stamp before attaching in case you make any mistakes. This way it is not permanently attached and you can fix it.

Don't forget to give your envelope some love too!
If you liked this card, please leave a comment. I invite you to come join me on my FB page Brenda's Stamping Pad or if there is something you need, shop with me HERE or click on any item below. Check out my other blog designs as well.
Product List


 Ruched Ribbon")


Love this card Brenda!
ReplyDeleteThank you Krissi.
Delete