Sailing Home

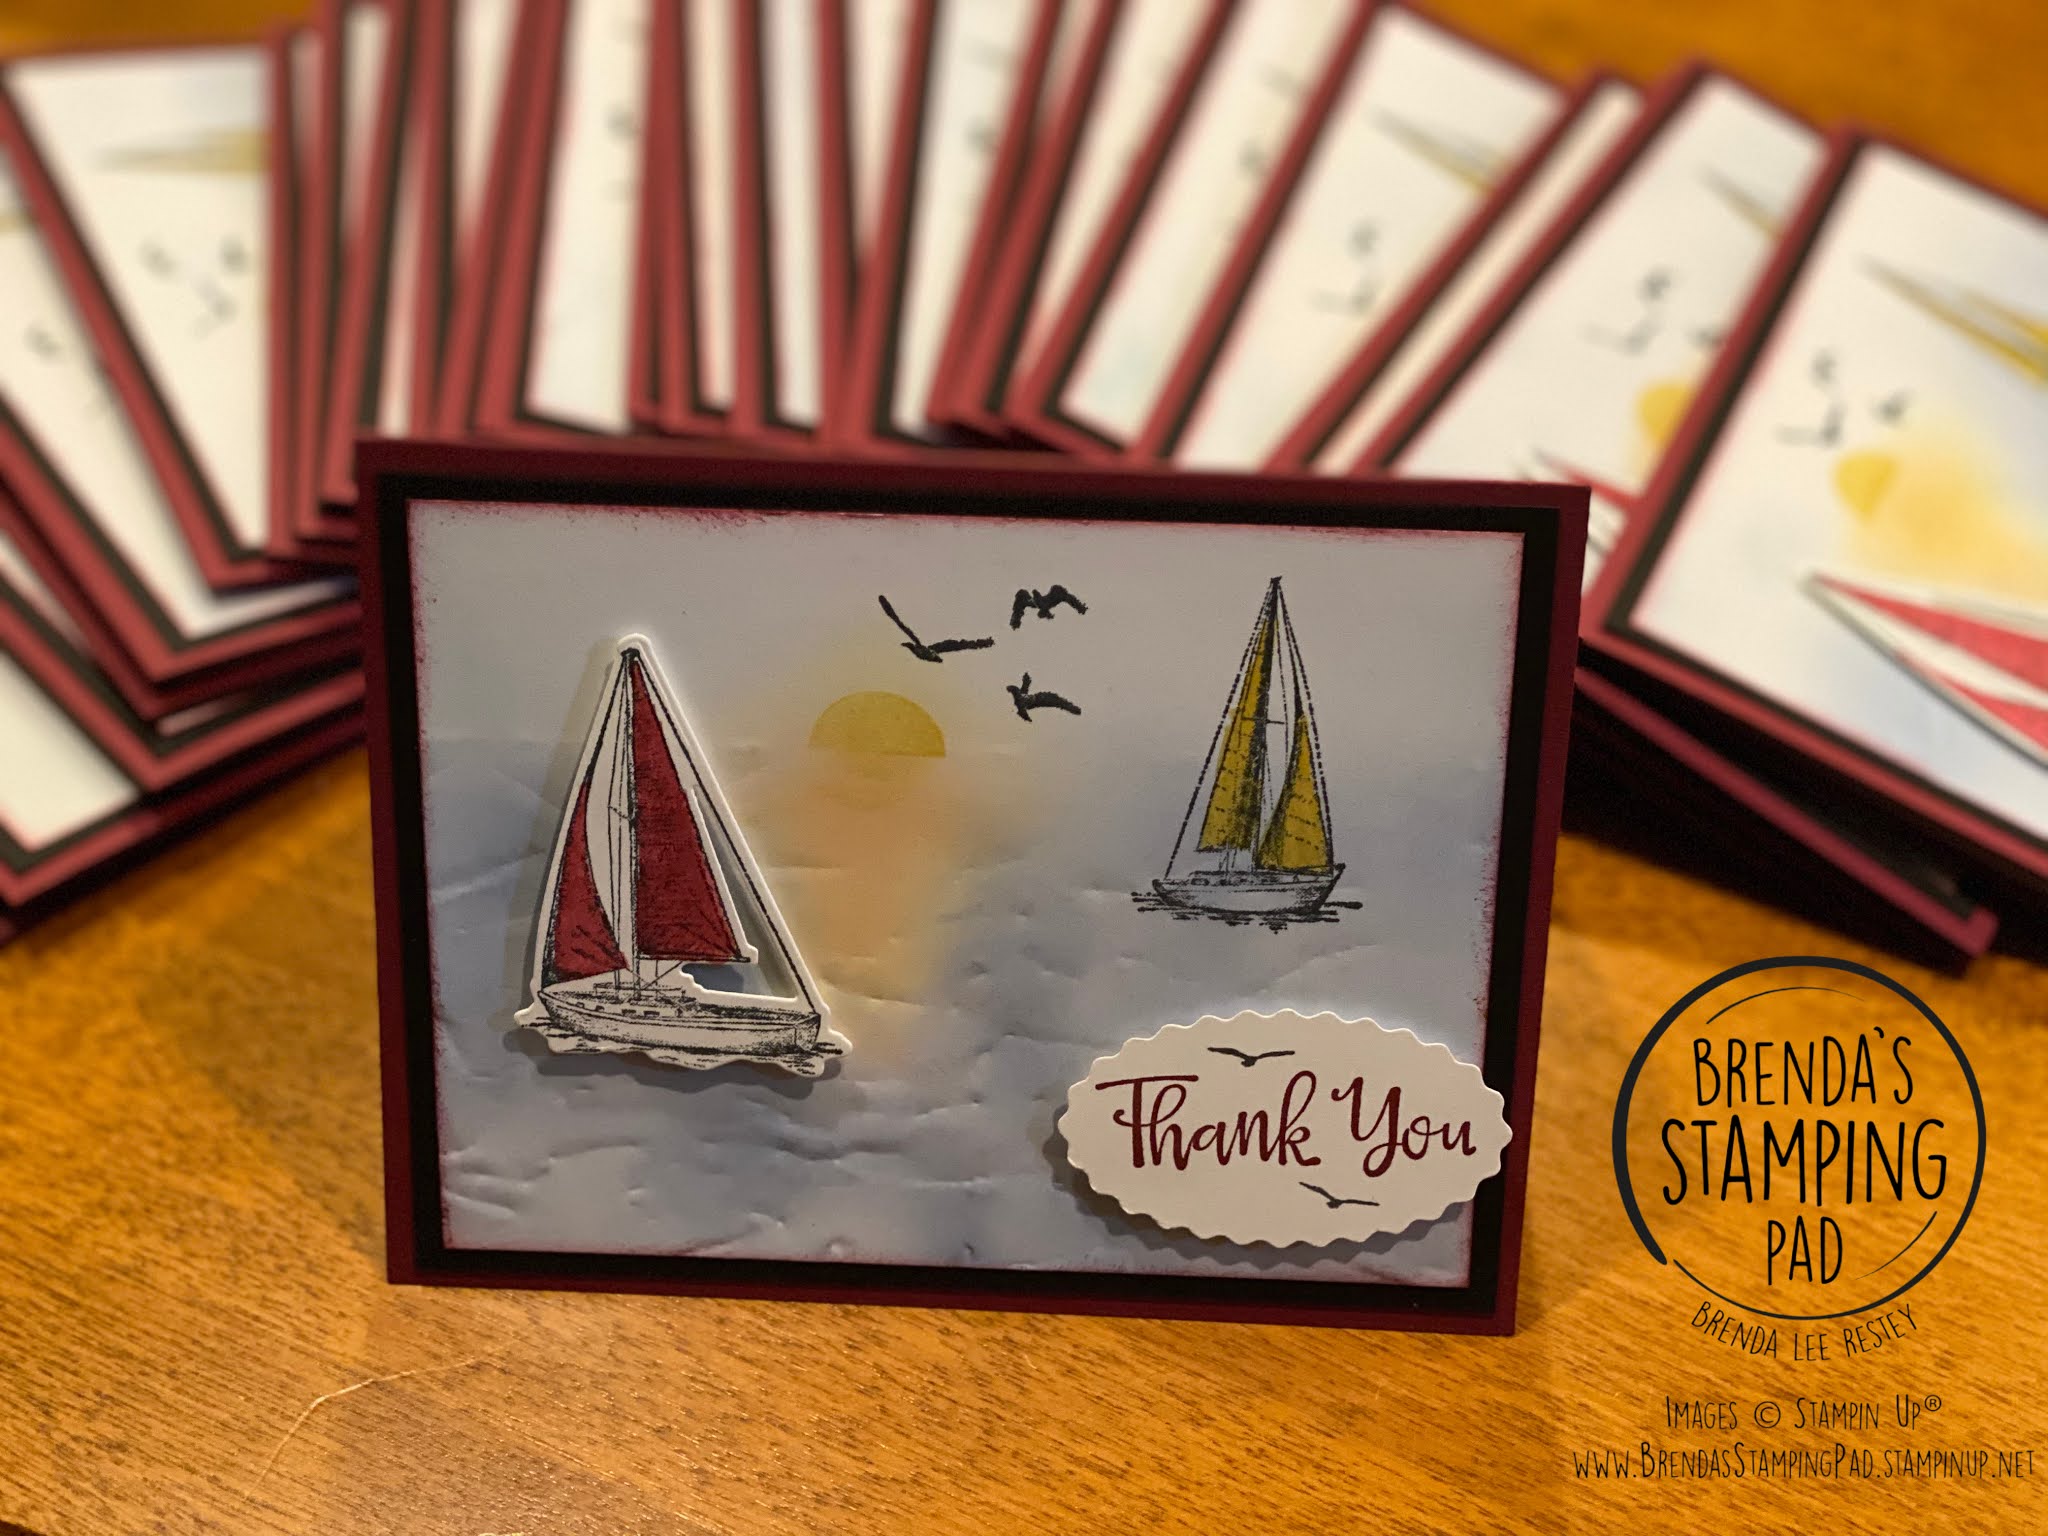
To start, I used Merry Merlot card stock cut 5 1/2" x 8 1/2", scored and folded at 4 1/4". The mat, in black, is 5 1/4" x 4". I adhered the black to the base card with Multipurpose Liquid Glue.
Next, I took a piece of Basic White card stock 3 3/4" x 5" to use as my palate. You cannot really tell in this picture, but I put the white card stock and used the Painted Texture 3D Embossing Folder. I did not run it through the Stampin' Cut and Embossing Machine because it would have created a deep pattern and I wanted a subtle one. Additionally, I did not want the whole piece embossed but a portion of it and the indentation would have been too marked. So.....I took a rolling pin and rolled across the embossing folder (actually had to press fairly hard). Since I needed 25 of these - I enlisted the help of the hubby.
With Balmy Blue color ink, I took a blending brush and lightly colored the sky. To create the sunset, I used the circle stamp from the High Tide stamp set (Annual Catalog). Then I used Bumble Bee ink (In-color 2020-2022) and stamped off once. I placed a post-it note onto the card stock and stamped half the circle. With the blending brush, I dabbed in Bubble Bee (remember to dab off first on paper) and just went back and force a little under the half circle. I added a little Calypso Coral for orangey color.
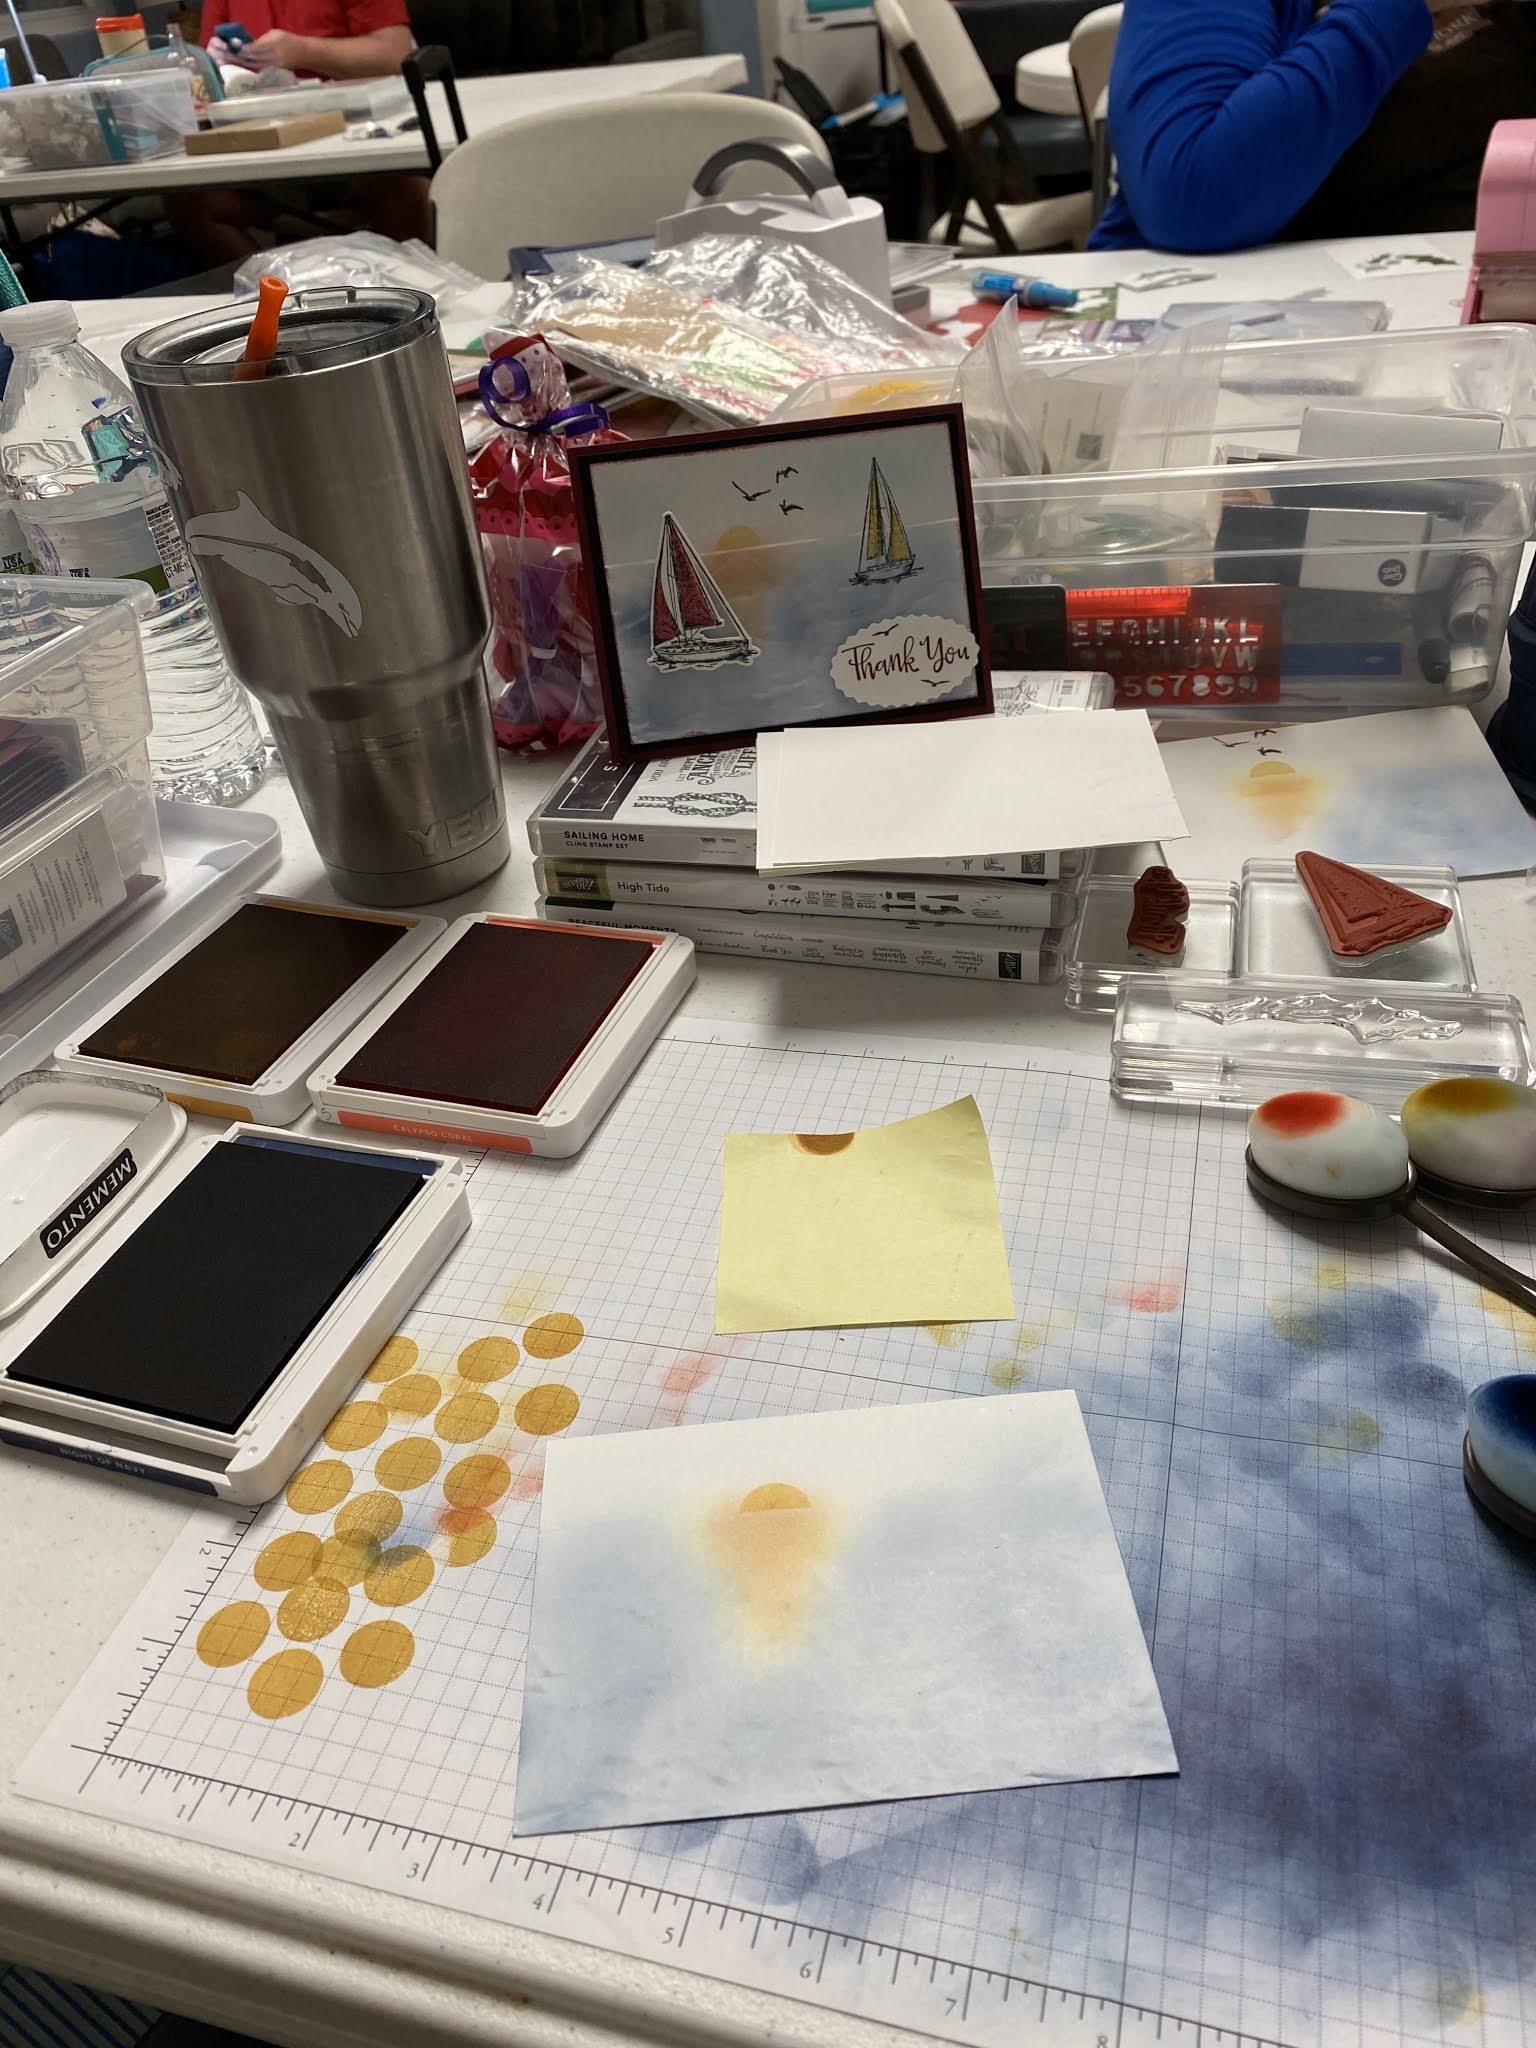
Next I added Night of Navy ink, still using the blending brushes. With the brushes, you don't want to start directly on the paper. Have some other paper underneath - start there and move on to your paper in circular motion. Keep adding color until you have the desired effect. I avoided the sunset area. Initially I had put the blue first on the whole "water" part but it made the sunset too messy.
Once I was happy with my landscape, I stamped the smaller sailboat from Sailing Home stamp set (Annual Catalog) in Momento Black ink directly onto the paper. I added the birds stamp from the same set still in the black.

This picture shows a little bit of the pseudo waves that I made. I colored the sails with Bumble Bee ink and a Water Painter (Annual Catalog). I took a piece of sponge, and in Merry Merlot ink, I lightly sponged around the edge of the landscaped paper.
On a smaller piece of white paper, I stamped the larger sailboat stamp. Using the Smooth Sailing Dies (Annual Catalog), I cut out the sailboat. I was able to use the Mini Stampin' Cut and Embossing Machine because of the size and it was super easy and smooth. Next, I colored the sails of the larger sailboat using the water painter in Merry Merlot ink. I adhered the sailboat using Stampin' Dimensionals.
For the sentiment, I cut the scalloped oval from the Double Oval punch (Jan - Jun 2021 Mini Catalog). I stamped with a sentiment from Peaceful Moments stamp set (one of my favorites - it has everything and the font is beautiful!) in Merry Merlot ink. I took the birds from the High Tide stamp set and just touched the one bird with black ink and put one above and below my sentiment. Using the dimensionals, I attached to the front. I adhered the whole piece to the black matting using Multipurpose Liquid Glue.
The inside has a piece of Basic White 5 1/4" x 4". In the lower right hand corner I put a little bit of Night of Navy using the blending brush. I stamped the smaller sailboat. Then I added the sentiment the customer requested.
Don't forget to give your envelope a little love too!


")


 Cardstock")


Comments
Post a Comment